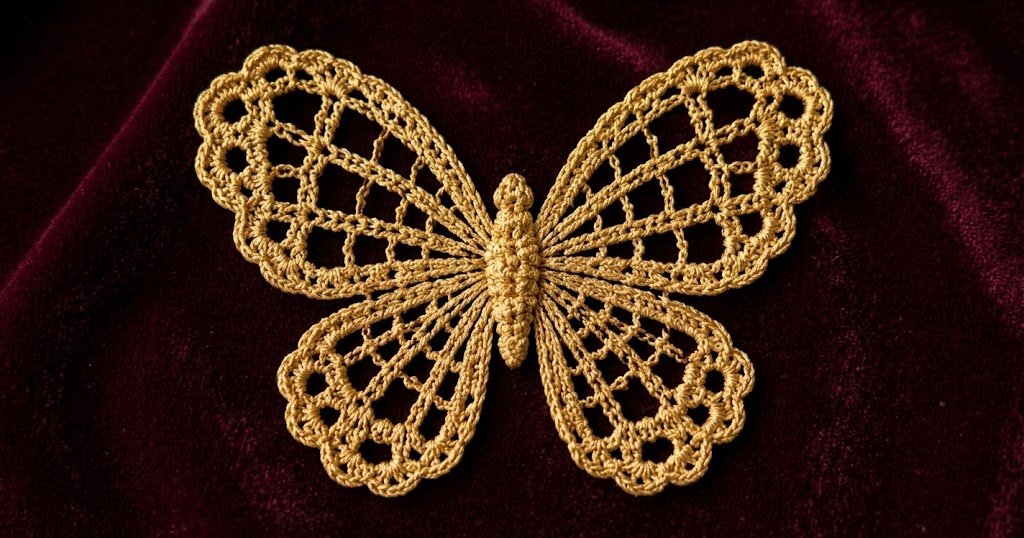
This delicate butterfly motif is worked in luxurious gold cotton yarn, bringing a rich, shimmering elegance to a classic vintage design. Four open wings fan out from a small center ring, built from long radiating stitches and chain spaces that create a see-through geometric mesh with a rounded triangular outline.
A scalloped shell trim runs around the outer edges of all four wings, while a solid body made of four stacked bobbles sits down the center. The radiant gold yarn elevates the filigree character, making it ideal for embellishments, framed lace art, festive ornaments, or garment appliqués.
Pattern Overview & Specifications
- Skill Level: Advanced (filigree lace, precise tension control)
- Terminology: US Crochet Terms
- Finished Size: 4.5 in (11.4 cm) wingtip to wingtip × 3.5 in (8.9 cm) tall
- Size Before Border: 4 in (10.2 cm) × 3 in (7.6 cm)
- Border Depth: 0.25 in (0.6 cm) on every edge
- Construction: Continuous. Starts with a center ring, followed by each wing worked in short turned rows. A single shell border round is worked around the entire outline, and the bobble body is crocheted in the same yarn before being tacked down.
- Number of Pieces: 1 (seamless continuous construction)
Materials & Tools
- Yarn: Sport weight (2, fine) mercerized cotton in Gold — 10 g (approx. 30 m / 33 yd). Mercerized cotton provides maximum stitch definition, crisp openness, and structural stability.
- Crochet Hook: 2.75 mm (US C-2)
- Notions: Tapestry needle, small sharp scissors, 4 stitch markers, rust-proof blocking pins, blocking mat, spray bottle.
- Optional: Light spray starch for added stiffness.
Crochet Abbreviations (US Terms)
| Abbreviation | Meaning |
| ch | chain |
| sl st | slip stitch |
| sc | single crochet |
| hdc | half double crochet |
| dc | double crochet |
| tr | treble crochet |
| sp | space |
| st(s) | stitch(es) |
| RS / WS | right side / wrong side |
| rep | repeat |
Special Stitch Definitions
- Large Shell:
(sc, hdc, 3 dc, hdc, sc)in the indicated chain-space. (7 stitches) - Small Shell:
(sc, hdc, dc, hdc, sc)in the indicated chain-space. (5 stitches) - Bobble:
*Yo, insert hook in st, yo and pull up a loop, yo and pull through 2 loops; rep from * 4 more times in the same st (6 loops on hook), yo and pull through all 6 loops.(1 stitch)
Gauge & Dimensional Checkpoints
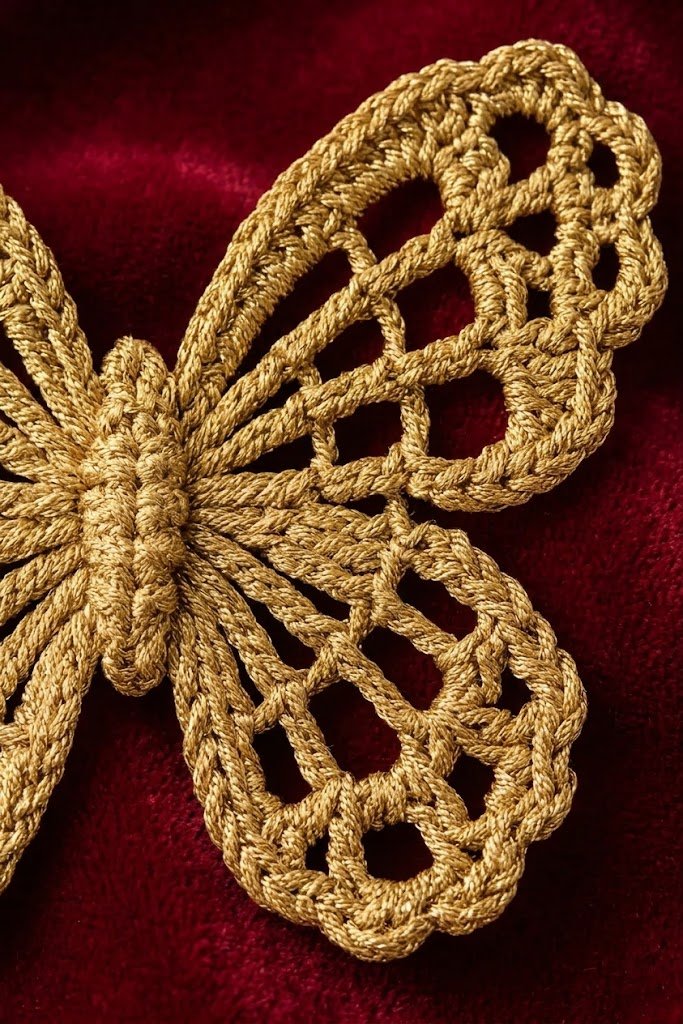
Main Gauge: 6 sc and 7 sc rows = 1 in (2.5 cm).
- 1 treble crochet (tr) stands ~0.5 in (1.3 cm) tall.
- 1 double crochet (dc) stands ~0.35 in (0.9 cm) tall.
Progress Checkpoints
- After Round 2: Center ring measures 0.8 in (2.0 cm) across and lies flat.
- After Wing A (Row 1): Treble spokes extend 0.5 in (1.3 cm) beyond the ring edge.
- After Wing A (Row 4): Wing extends 1.6 in (4.1 cm) from the ring edge.
- After Wing B (Row 3): Lower wing extends 1.1 in (2.8 cm) from the ring edge.
- After All Wings: Motif measures 4 in (10.2 cm) × 3 in (7.6 cm).
- After Shell Border: Final motif measures 4.5 in (11.4 cm) × 3.5 in (8.9 cm).
Tension Adjustments:
- If your motif is too large, switch to a 2.5 mm hook or tighten your chain spaces.
- If your motif is too small, switch to a 3.0 mm hook and fully extend tall stitches before completing them.
Step-by-Step Instructions
Center Ring
- Rnd 1: Make a magic ring. Ch 1, work 10 sc into the ring, sl st to the first sc. Pull ring tight. (10 sc)
- Rnd 2: Ch 1, work 2 sc in each st around, sl st to first sc. (20 sc)
- Fasten off and weave in the center ring tail.
Stitch Allocation Guide
Number the 20 stitches clockwise/working direction starting at top center:
- Sts 1–2: Top body point (leave unworked)
- Sts 3–6: Wing A (Upper Right) — Place marker in St 3
- Sts 7–10: Wing B (Lower Right) — Place marker in St 7
- Sts 11–12: Bottom body point (leave unworked)
- Sts 13–16: Wing C (Lower Left) — Place marker in St 13
- Sts 17–20: Wing D (Upper Left) — Place marker in St 17
Upper Wings (Wings A & D)
Work Wing A on sts 3–6. Work Wing D on sts 17–20.
- Row 1 (RS): Join gold yarn in first wing st. Ch 4 (counts as tr), ch 2, tr in same st, ch 2.
*(Tr, ch 2, tr) in next st, ch 2; rep from *once more. Work(tr, ch 2, tr)in last st. Turn. (8 tr, 7 ch-2 sps) - Row 2 (WS): Ch 3 (counts as dc).
*Ch 3, dc in next tr; rep from *6 times, working last dc in top of turning ch. Turn. (8 dc, 7 ch-3 sps) - Row 3 (RS): Ch 3 (counts as dc).
*Ch 4, dc in next dc; rep from *6 times. Turn. (8 dc, 7 ch-4 sps) - Row 4 (WS): Ch 1, sc in first dc.
*Ch 5, sc in next dc; rep from *6 times. (8 sc, 7 ch-5 sps) - Fasten off.
Lower Wings (Wings B & C)
Work Wing B on sts 7–10. Work Wing C on sts 13–16.
- Row 1 (RS): Join gold yarn in first wing st. Ch 3 (counts as dc), ch 2, dc in same st, ch 2.
*(Dc, ch 2, dc) in next st, ch 2; rep from *once more. Work(dc, ch 2, dc)in last st. Turn. (8 dc, 7 ch-2 sps) - Row 2 (WS): Ch 3 (counts as dc).
*Ch 3, dc in next dc; rep from *6 times. Turn. (8 dc, 7 ch-3 sps) - Row 3 (RS): Ch 1, sc in first dc.
*Ch 4, sc in next dc; rep from *6 times. (8 sc, 7 ch-4 sps) - Fasten off. Weave in all wing ends before starting the border.
Scalloped Border
Side-edge stitch allocation: Tr row ends = 3 sc; Dc row ends = 2 sc; Sc row ends = 1 sc.
- Border Rnd (RS): Join gold yarn with sl st in st 1 of ring, sl st in st 2.
Wing A:
- Outer Side: Work 8 sc along row ends (3 + 2 + 2 + 1), placing last sc into corner sc of Row 4.
- Top Arc: Work 1 Large Shell in each of the 7 ch-5 sps.
- Inner Side: Work 8 sc along row ends (1 + 2 + 2 + 3), placing first sc into corner sc of Row 4. (Wing A total: 65 sts)
- Junction: Sl st into ring between sts 6 and 7 (uncounted).
Wing B:
- Outer Side: Work 5 sc along row ends (2 + 2 + 1), placing last sc into corner sc of Row 3.
- Bottom Arc: Work 1 Small Shell in each of the 7 ch-4 sps.
- Inner Side: Work 5 sc along row ends (1 + 2 + 2). (Wing B total: 45 sts)
- Bottom Center: Sl st in st 11 and st 12 of ring.
Wing C:
- Work identical to Wing B. (45 sts)
- Junction: Sl st into ring between sts 16 and 17 (uncounted).
Wing D:
- Work identical to Wing A. (65 sts)
- Sl st to first sl st of round. Do not fasten off.
(Total Border: 220 sts + 6 uncounted sl sts)
Central Bobble Body
- Body Chain: From the top join sl st, ch 10.
- Body Row: Bobble in 3rd ch from hook (head).
*Sl st in next ch, bobble in next ch; rep from *twice more. Sl st in last ch at base. (4 bobbles, 4 sl sts) - Assembly:
- Fold bobble strip down vertically over center ring so the head sits above top body point.
- Cut yarn leaving a 10 in (25.4 cm) tail.
- Using tapestry needle, tack base of each bobble through ring and bottom sl sts.
- Fasten off securely on WS.
Blocking & Finishing Instructions
- Submerge piece in cool water and gently press out excess water with a towel (do not wring).
- Lay RS up on blocking mat.
- Pin bobble body straight down center line.
- Pin upper and lower wingtips symmetrically to achieve a 4.5 in (11.4 cm) width and 3.5 in (8.9 cm) height.
- Pin every shell scallop peak outward to open lace mesh windows.
- (Optional) Apply a light mist of spray starch for crispness.
- Allow to dry completely (4–6 hours) before unpinning.
Troubleshooting & Care Guide
- Ring Ruffling/Cupping: Confirm exactly 10 sc in Rnd 1 and 20 sc in Rnd 2. Overcounting causes ruffling.
- Curling Wings: Chains are too tight relative to tall stitches. Increase chain space looseness or hook size by 0.25 mm.
- Puckered Side Edges: Re-check row-end sc count (8 sc for upper wings, 5 sc for lower wings).
- Flat Bobbles: Pull up higher loops before closing bobble stitches, and tack at the base rather than across the center.
- Care Instructions: Hand wash gently in cool water with delicate soap. Reshape and pin flat to dry. Re-apply starch as needed.