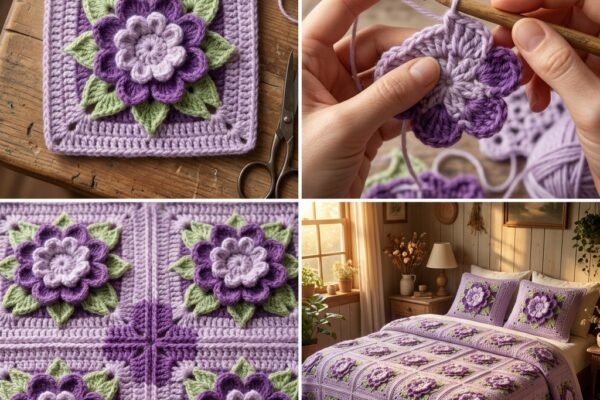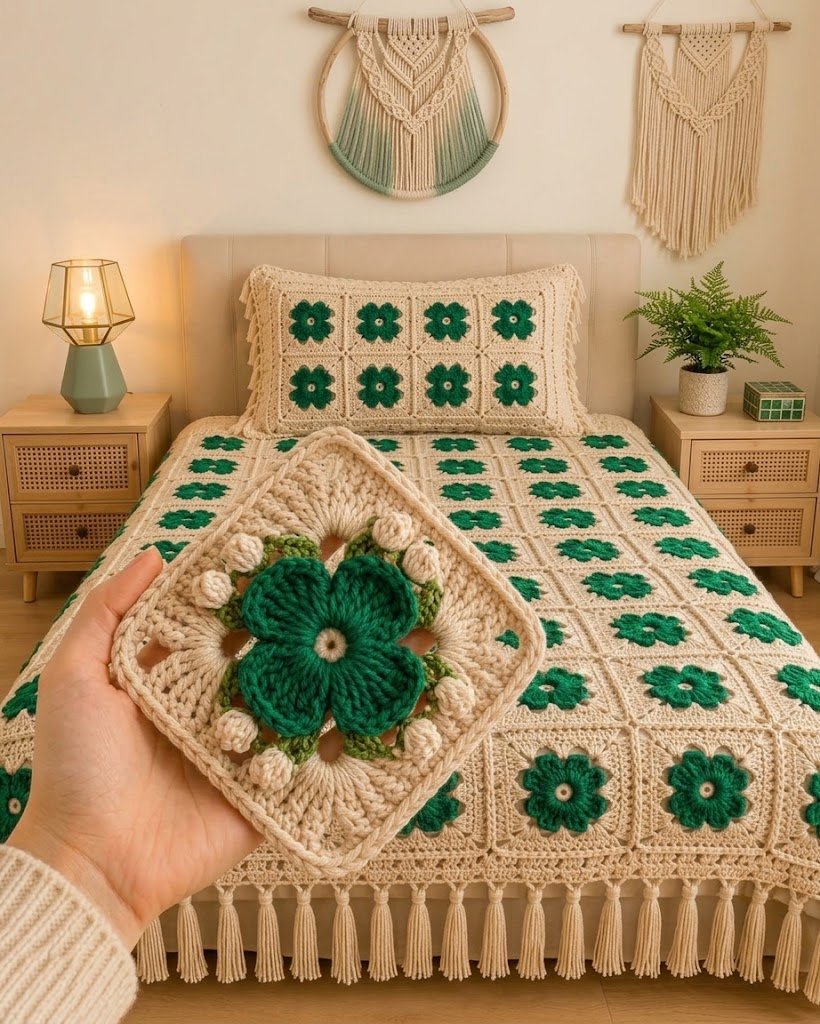
A comprehensive step-by-step guide to making 3D flower motifs, assembling them into a bedspread, and finishing with lace borders and tassels.
🛠️ Pattern Overview & Details
- Skill Level: Intermediate
- Terminology: US Crochet Terms
- Motif Size: Approx. 8 × 8 inches (20 × 20 cm) after blocking (varies by yarn and hook)
- Pattern Structure: Individual 3D floral motifs crocheted in rounds, joined into a grid, finished with a lace border and tassels.
Recommended Materials
| Material | Specifications |
| Yarn Main Color (MC) | Warm Cream / Ivory (DK or Light Worsted Weight) |
| Flower Center & Petals | Deep Red / Cranberry (DK or Light Worsted Weight) |
| Flower Leaves & Stem Base | Olive, Forest, or Sage Green (DK or Light Worsted Weight) |
| Crochet Hook | 4.0 mm (G/6) for DK yarn or 4.5–5.0 mm (H/8) for Worsted yarn |
| Notions | Yarn needle, scissors, stitch markers, blocking mats & rust-resistant pins, cardboard for tassels |
Abbreviations
- ch: chain
- sl st: slip stitch
- sc: single crochet
- hdc: half double crochet
- dc: double crochet
- tr: treble crochet
- sp / spaces: space / spaces
- st / sts: stitch / stitches
🌸 Complete Step-by-Step Motif Pattern
1.Round 1: Red Flower Center :Red Yarn.
- Make a magic ring with Red yarn.
- Work 10 sc into the ring.
- Join with a sl st to the first sc. (Do not pull the magic ring completely tight if you want a slight open ring center).
2.Round 2: Petal Foundation Loops :Red Yarn.
- Working into Round 1:
[1 sc, ch 3, skip 1 st]5 times total around. - Join with a sl st to the first sc. (You will have 5 evenly spaced ch-3 loops).
3.Round 3: Raised Red Petals :Red Yarn.
Into each of the 5 ch-3 loops, work the following petal sequence:
- 1 sc, 1 hdc, 3 dc, 2 tr, 3 dc, 1 hdc, 1 sc
Sl st into the sc between loops before moving to the next petal space.
- Fasten off Red yarn securely.
4.Round 4: Green Leaf Base & Backing :Attach Green Yarn to Back of Flower.
- Working behind the red petals, attach Green yarn around the post of a stitch from Round 1 or into the back loop of Round 2.
- Work:
[1 sc behind petal, ch 4]behind each of the 5 petals. - Join with a sl st to the first sc. (5 green ch-4 spaces created behind the red petals).
5.Round 5: Green Leaf Points :Green Yarn.
Into each green ch-4 space behind the petals, work:
- 1 sc, 1 hdc, 2 dc, 2 tr, 2 dc, 1 hdc, 1 sc
This creates green leaf frames sitting directly under and extending slightly beyond the red petals. Fasten off Green yarn.
6.Round 6: Cream Transition Foundation :Attach Cream Yarn behind Green Leaves.
- Attach Cream yarn to the back loops/posts behind the green leaves.
- Work:
[1 sc, ch 4]behind each leaf to create 8 evenly spaced chain loops around the circular motif. - Join with a sl st to the first sc.
7.Round 7: Squaring the Motif :Cream Yarn.
Convert the circular foundation into 4 square corners:
- Corner:
(3 dc, ch 2, 3 dc)in designated corner loop. - Side:
3 dcin next loop,ch 1. - Repeat around all 4 sides and corners. Join with a sl st to top of initial ch-3.
8.Round 8: Openwork Lace Round :Cream Yarn.
- Corners:
(3 dc, ch 2, 3 dc)into each corner ch-2 sp. - Sides:
3 dcinto each ch-1 sp along the sides, separated bych 1. - Join with a sl st.
9.Round 9: Final Square Frame :Cream Yarn.
- Work 1 sc (or 1 hdc) into every stitch across the sides.
- Work
(sc, ch 2, sc)into each corner ch-2 sp. - Fasten off and weave in all ends securely.
📐 Sizing & Motif Calculations
Block your master motif flat before calculating blanket dimensions.
| Item | Motifs Grid | Total Motifs | Approx. Dimensions |
| Small Throw | 4 × 5 | 20 motifs | 32″ × 40″ (80 × 100 cm) |
| Large Throw | 5 × 6 | 30 motifs | 40″ × 48″ (100 × 120 cm) |
| Single Bed | 6 × 8 | 48 motifs | 48″ × 64″ (120 × 160 cm) |
| Full / Queen | 7 × 9 | 63 motifs | 56″ × 72″ (140 × 180 cm) |
| Large Bedspread | 8 × 10 | 80 motifs | 64″ × 80″ (160 × 200 cm) |
Note: Measurements do not include the additional 4–6 inches added by the outer lace border and tassel fringe.
🧩 Assembly & Joining Methods
- Blocking: Pin each motif to exact size on blocking mats. Steam lightly or wet-block. Do not flatten the raised red flower petals.
- Arrangement: Lay motifs on a flat surface, ensuring all flowers face right-side up.
- Joining Method Options:
- Slip-Stitch Join (Flat Seam): Place two motifs right sides together, sl st through inner loops only.
- Single Crochet Join (Raised Seam): Sc through both loops of adjacent motifs to create a defined vintage grid outline.
- Mattress Stitch (Invisible Seam): Sew corresponding edge stitches together with a yarn needle using Cream yarn.
- Assembly Order: Join motifs horizontally into full rows, then join rows together vertically.
🎀 Border & Tassel Construction
1.Base Border Rounds :Cream Yarn.
- Round 1: Attach Cream yarn to any corner. Work sc evenly around all edges. Work
(sc, ch 2, sc)at each corner. - Round 2: Work dc across all sides, working
(2 dc, ch 2, 2 dc)in each corner ch-2 sp.
2.Lace Border Rounds :Cream Yarn.
- Lace Round 1:
[1 sc, ch 3, skip 2 sts]around to create arch foundations. - Lace Round 2: Work
(3 dc, ch 2, 3 dc)shell groups into alternating ch-3 sps around. - Final Edge: Work 1 sc or 1 hdc into every st and space to create a strong, solid base line for tassels.
3.Tassel Creation & Attachment :Cream Yarn.
- Wrap Cream yarn 20 times around a 4.5-inch piece of cardboard.
- Tie top securely with a 10-inch length of yarn, cut bottom loops, and wrap yarn around the upper neck to form the head.
- Attach tassels to every 2nd or 3rd lace repeat along the outer edges using a yarn needle or crochet hook.
- Hang blanket and trim tassel ends evenly.
🛏️ Matching Decorative Cushion Cover
- Front Panel: Join 4 motifs (2 × 2 grid) or 8 motifs (4 × 2 grid).
- Border: Add 2 rounds of Cream dc, finishing with a 5-dc shell stitch edge (
5 dc in sp, sl st in next sp). - Backing: Crochet two overlapping solid Cream panels (envelope closure) and sew to the front motif panel.
🧼 Care Instructions & Yarn Estimation
Yarn Estimation Tip:
Weigh 1 complete blocked motif on a gram scale.
$$\text{Total Yarn Needed} = (\text{Motif Weight in Grams} \times \text{Total Motifs}) + 35\% \text{ (for borders, joins, tassels)}$$
Always buy ~75% Cream and ~25% Red/Green yarn ratio.
- Colorfastness Check: Wash a red and cream swatch prior to assembly to prevent dye bleeding.
- Washing: Hand wash or use a delicate machine cycle in cold water with gentle detergent.
- Drying: Lay flat to dry; reshape border and straighten tassels while damp. Do not tumble dry on high heat.