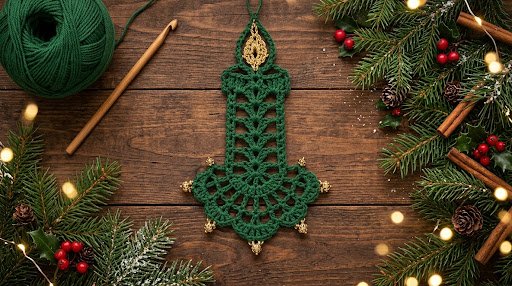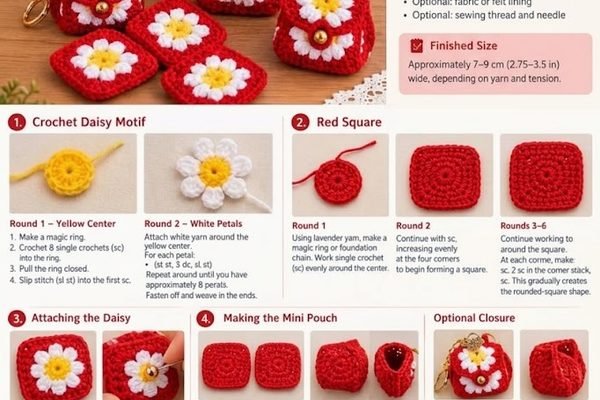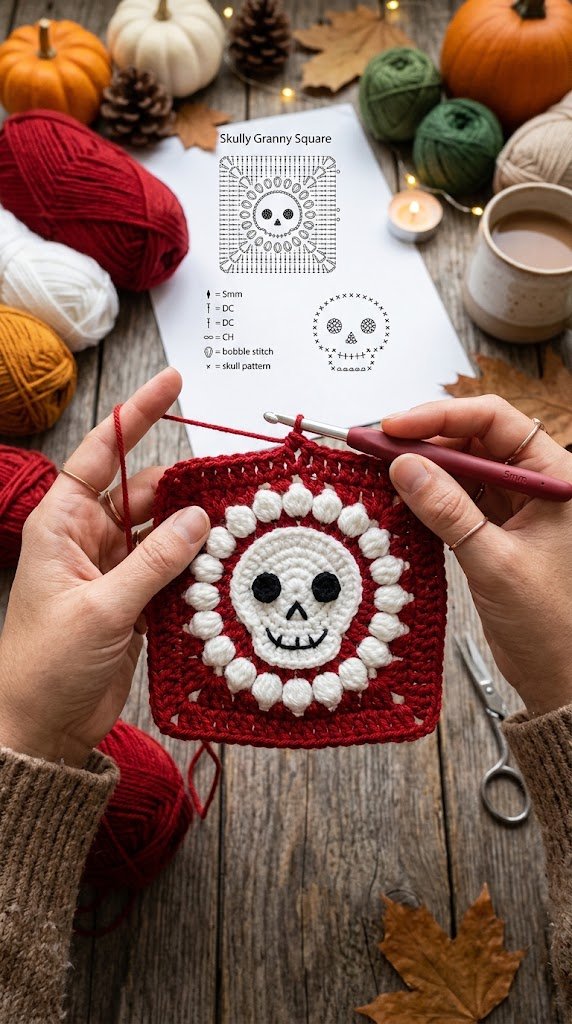
Create a bold and festive red sugar skull crochet granny square with a white skull centerpiece, black facial details, and a textured white bobble border. This colorful crochet motif combines classic granny-square construction with a playful skull design, making it a fun project for Halloween décor, seasonal blankets, bags, cushions, wall hangings, and other handmade projects.
The original design uses a green background; this version changes the background to a rich red while keeping the white skull, black eyes and facial details, and white textured border.
The project is worked from the center outward and combines circular crochet, color changes, textured stitches, appliqué, and simple embroidery.
Pattern note: This is an original rewritten presentation based on the supplied pattern. The red colorway is used throughout the background instructions.
Project Overview
This crochet square is built in several stages:
- Crochet the white skull centerpiece.
- Make two black eyes.
- Crochet the small black nose.
- Add the white textured bobble ring around the skull.
- Build the red background outward.
- Shape the circular motif into a square.
- Sew the skull details into position.
- Embroider the mouth and teeth.
- Block the finished square.
The finished motif measures approximately 8 × 8 inches (20 × 20 cm).
The combination of red, white, and black creates a strong contrast that works especially well for Halloween and gothic-inspired crochet projects.
Skill Level
Intermediate
This project is suitable if you are comfortable with:
- Crocheting in the round
- Double crochet
- Half double crochet
- Single crochet
- Color changes
- Bobble or popcorn stitches
- Increasing
- Basic appliqué
- Simple embroidery
- Blocking
An adventurous advanced beginner can also attempt the project by working slowly and checking the stitch counts after each round.
Materials
Yarn
Use worsted-weight (#4) yarn in approximately these amounts:
- White: 45 g – skull and bobble details
- Black: 10 g – eyes, nose, mouth, and teeth
- Rich red: 50 g – square background
Cotton, cotton-blend, or acrylic yarn can be used depending on the intended project.
For a structured granny square, choose yarn with good stitch definition so the skull and textured border remain clearly visible.
Crochet Hook
- US H/8 (5.0 mm) crochet hook, or size needed to obtain your preferred gauge
Other Supplies
- Tapestry needle
- Small scissors
- Stitch markers
- Blocking board
- Blocking pins
- Measuring tape
Finished Size
Approximate finished size:
8 × 8 inches (20 × 20 cm)
The finished dimensions can vary according to yarn, hook size, tension, and the number of border rounds.
For a larger blanket square, additional red border rounds can be added while maintaining the corner increase pattern.
Gauge
Approximately:
13 dc × 7 rows = 4 inches (10 cm) after blocking, excluding the textured bobbles.
Gauge is not extremely critical for a decorative square, but maintaining consistent tension is important for keeping the motif flat and symmetrical.
Crochet Abbreviations
US crochet terminology is used.
| Abbreviation | Meaning |
|---|---|
| ch | chain |
| sl st | slip stitch |
| sc | single crochet |
| hdc | half double crochet |
| dc | double crochet |
| tr | treble crochet |
| MR | magic ring |
| inc | increase |
| dec | decrease |
| popcorn | 5-dc popcorn stitch |
Important Pattern Notes
Before beginning, keep these points in mind:
- Beginning chains count as stitches only where specified.
- Join rounds with a slip stitch as instructed.
- For cleaner color changes, change yarn on the final yarn-over of the previous stitch.
- Keep the right side facing throughout the project unless otherwise indicated.
- A stitch marker can be used to identify the beginning of each round.
- Check the shape regularly while working the red border.
- Avoid pulling your stitches too tightly around the skull motif.
Part 1: Crochet the White Skull
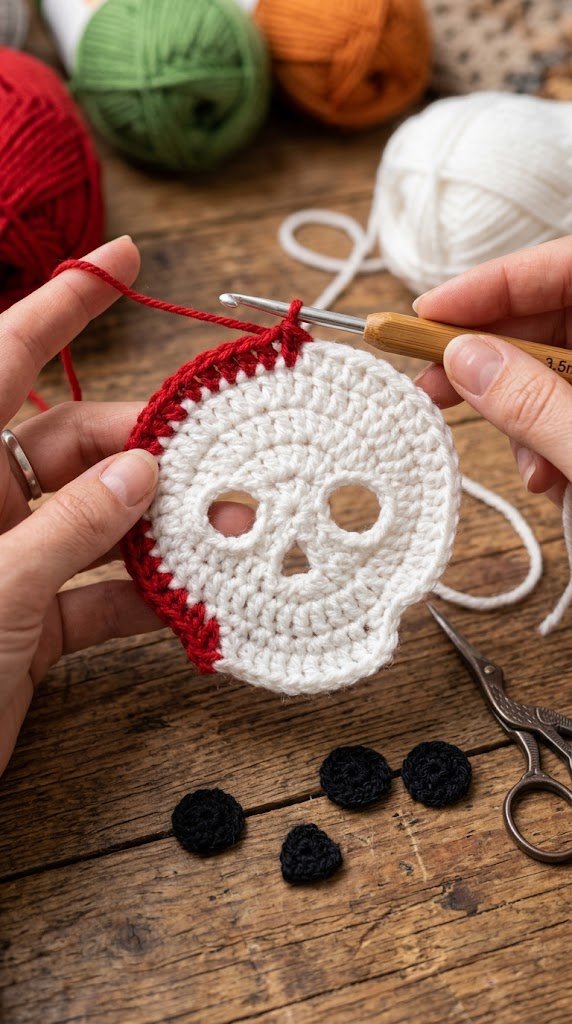
Begin with white yarn.
The skull is crocheted as a circular motif that is gradually shaped toward the lower portion of the face.
Round 1
Make a magic ring.
Ch 2, which counts as the first dc.
Work 11 dc into the magic ring.
Join with a sl st to the first dc.
Total: 12 dc
Pull the center of the magic ring closed.
Round 2
Ch 2.
Work 1 dc in the same stitch.
Work 2 dc in each stitch around.
Join with a sl st.
Total: 24 dc
The circle should now be noticeably larger while remaining flat.
Round 3
Ch 2.
Work 1 dc in the same stitch.
Repeat:
1 dc in the next stitch, 2 dc in the following stitch.
Continue around.
Join with a sl st.
Total: 36 dc
Round 4
Ch 1.
Work:
- 1 sc in each of the next 8 stitches
- 1 hdc in each of the next 8 stitches
- 1 dc in each of the next 12 stitches
- 1 hdc in each of the next 8 stitches
Join with a sl st.
Total: 36 stitches
Do not fasten off yet.
Round 5 – Shape the Skull
This round gives the lower portion of the skull a slightly narrower shape.
Ch 1.
Work:
- sc in each of the first 8 stitches
- hdc in the next 4 stitches
- dc2tog over the next 2 stitches
- dc in the next 8 stitches
- dc2tog over the next 2 stitches
- hdc in the next 4 stitches
- sc in the remaining 8 stitches
Join with a sl st.
Total: 34 stitches
Fasten off and leave a long yarn tail for sewing.
Set the skull aside while you prepare the facial details.
Part 2: Make the Black Eyes
Make 2 eyes using black yarn.
For each eye:
- Make a magic ring.
- Ch 1.
- Work 8 sc into the ring.
- Join with a sl st to the first sc.
- Fasten off.
- Leave a yarn tail for sewing.
Keep both eyes approximately the same size.
Part 3: Make the Black Nose
Using black yarn:
- Ch 4.
- Sl st into the second chain from the hook.
- Sc in the next chain.
- Hdc in the final chain.
- Fasten off.
- Leave a yarn tail for sewing.
The resulting piece should form a small triangular nose.
Part 4: Add the White Bobble Ring
The textured white border creates a decorative halo around the skull.
Using white yarn, attach the yarn around the outer edge of the skull.
Round 6
Work a popcorn/bobble stitch followed by a sc around the motif.
Repeat the sequence evenly around the skull.
Aim for approximately 18 bobbles.
Join with a sl st.
Fasten off.
Bobble Tip
The bobbles should create a visible textured border without pulling the skull inward.
If the ring looks too tight, check your tension before continuing.
Part 5: Build the Red Background
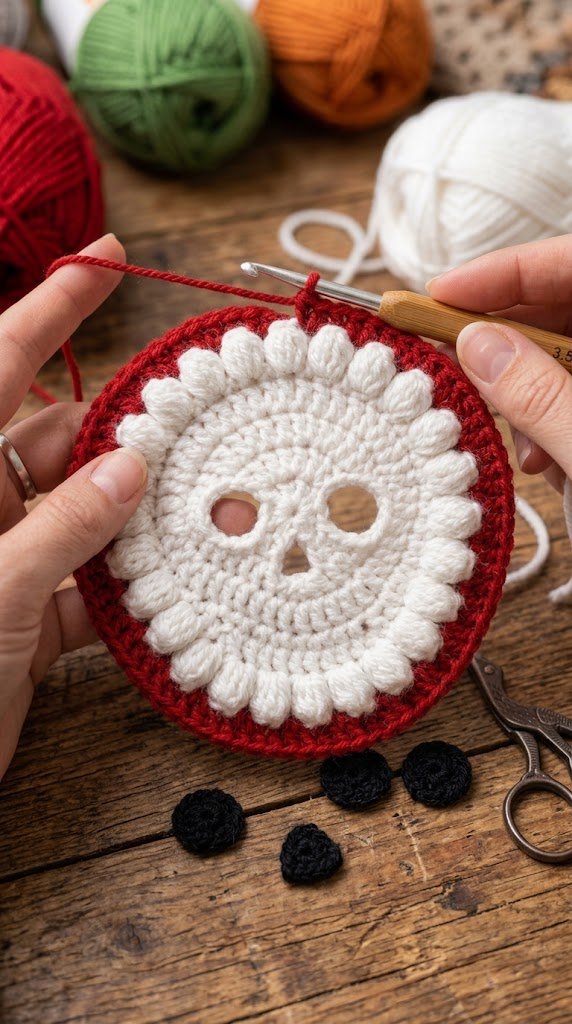
Now introduce the rich red yarn.
This is the main color change that gives this version its distinctive Christmas-red/Halloween-red appearance.
Attach red yarn at any point around the white bobble ring.
Round 7
Ch 3, counting as the first dc.
Work dc around the motif, placing stitches into the appropriate sc stitches and bobble tops.
Begin forming four corners by working:
(2 dc, ch 2, 2 dc)
at each corner location.
Continue around the motif.
Join with a sl st.
The exact stitch count can vary slightly depending on bobble placement, but aim for relatively even sides.
Shape Check
Lay the work flat.
The developing motif should begin transitioning from a circle into a square.
If one side is pulling inward, check your corner increases before continuing.
Round 8
Ch 3.
Work dc across the side until reaching the next corner.
In the corner space, work:
(2 dc, ch 2, 2 dc)
Continue across the next side.
Repeat at all four corners.
Join with a sl st.
Your square should now have clearly defined corners.
Rounds 9–10
Continue working the red background.
At each corner, work:
(2 dc, ch 2, 2 dc)
Across each side, work 1 dc in each stitch.
Repeat around.
Continue until the square reaches approximately 8 × 8 inches or your desired size.
Fasten off and weave in the red yarn ends.
Part 6: Position the Skull
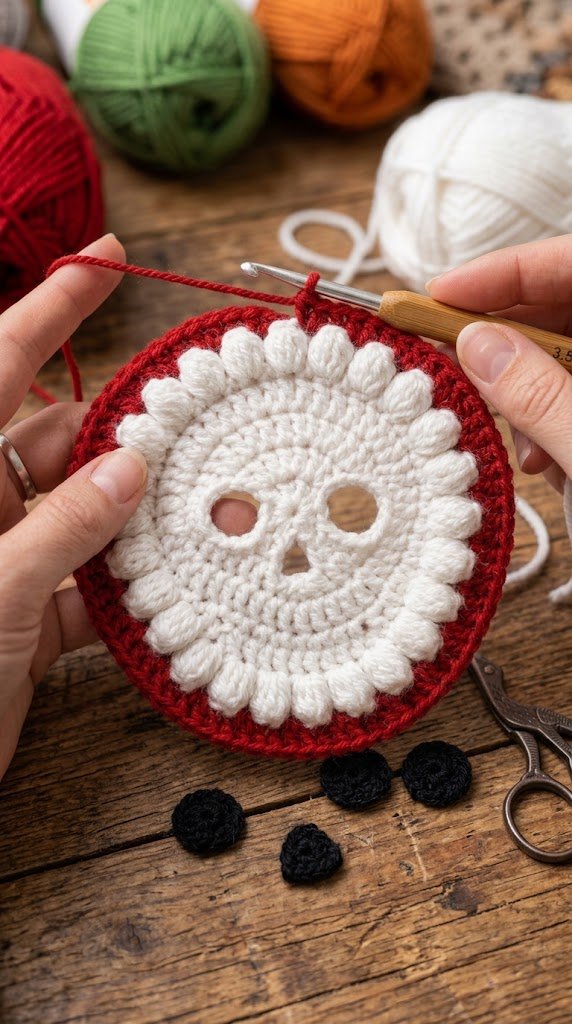
Place the completed white skull in the center of the red square.
Check the positioning from all four sides before sewing.
The skull should sit centrally within the red background, with approximately even spacing around the motif.
Use the long white yarn tail and a tapestry needle to sew the skull securely to the square.
Use small stitches so the attachment points remain discreet.
Part 7: Attach the Eyes and Nose
Position the two black eyes on the upper-middle portion of the skull.
Leave a similar amount of space between each eye and the skull edges.
Place the black triangular nose underneath and between the eyes.
Once you are happy with the placement, sew each piece securely using its yarn tail.
Weave the remaining ends into the back of the work.
Part 8: Embroider the Skull Mouth
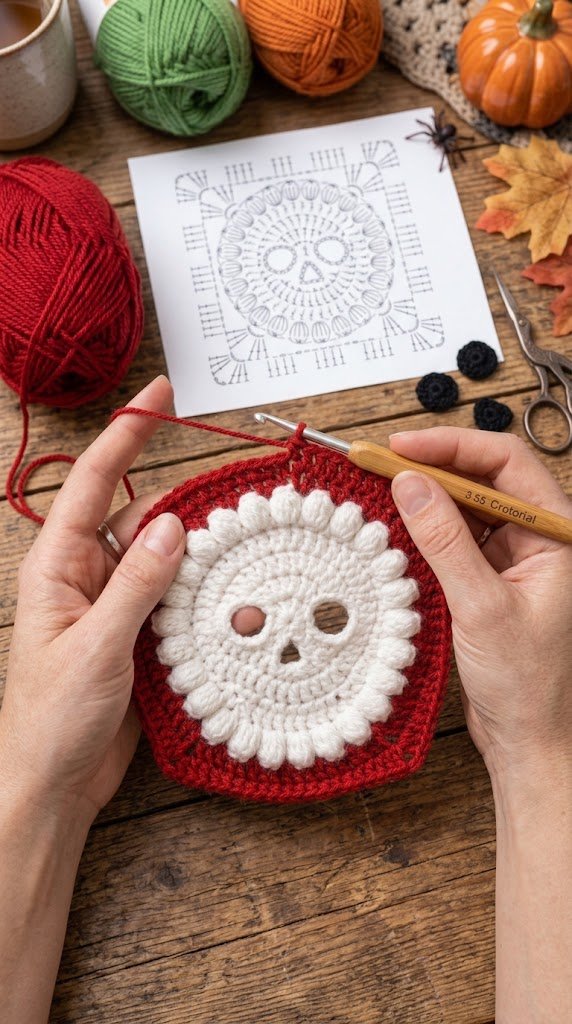
Use black yarn for the mouth.
Create a slightly curved horizontal line across the lower portion of the skull using backstitch or whipstitch.
Then add several short vertical stitches crossing the mouth line to create the appearance of teeth.
For a balanced face, keep the teeth relatively evenly spaced.
You can make the expression:
- Friendly
- Spooky
- Playful
- Slightly mischievous
depending on how you shape the mouth.
Part 9: Finishing
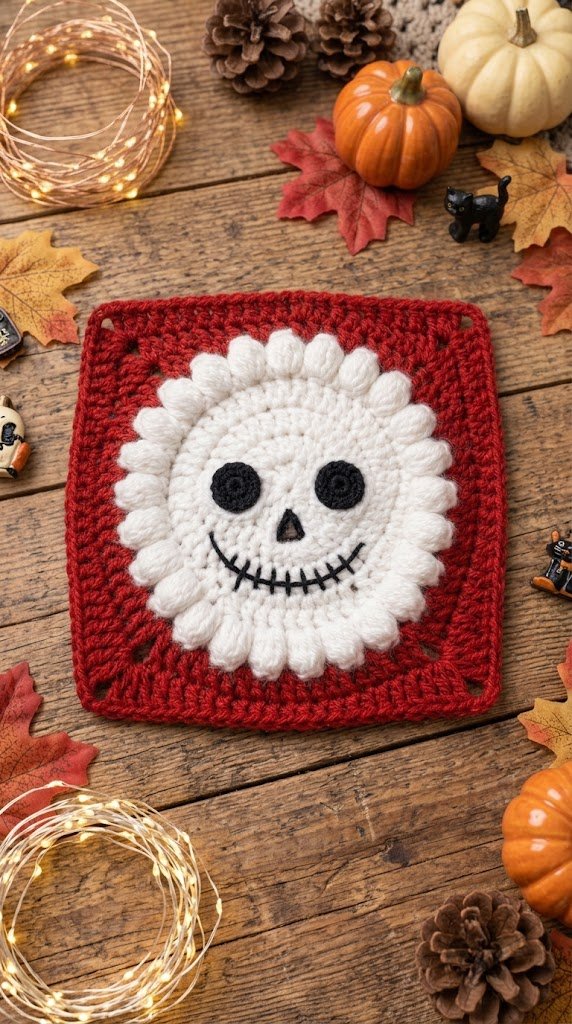
Carefully weave all remaining yarn tails into the back of the square.
Trim excess yarn only after the ends are securely woven in.
Inspect the front of the square for:
- Loose stitches
- Uneven corners
- Misaligned eyes
- Loose appliqué pieces
- Uneven mouth stitches
Make any corrections before blocking.
Blocking the Granny Square
Blocking can dramatically improve the finished appearance.
Place the square on a blocking board.
Gently shape it into an even square and pin:
- The four corners
- The four sides
- Any areas that need gentle adjustment
Lightly mist the piece with water or use your preferred blocking method.
Allow it to dry completely before removing the pins.
Avoid stretching the skull excessively during blocking.
Customization Ideas
Change the Red Shade
You can use different shades of red depending on the mood you want:
- Deep burgundy
- Crimson
- Cherry red
- Classic Christmas red
- Dark wine red
- Bright scarlet
A darker red creates a more gothic appearance, while a brighter red gives the square a cheerful seasonal look.
Change the Skull Expression
Small changes to the embroidered mouth can completely change the character of the skull.
Try:
- A smiling mouth
- A crooked grin
- A wider spooky smile
- Smaller teeth
- Longer teeth
Make a Blanket
Create multiple red skull squares and join them together to make a seasonal blanket.
For additional variety, alternate the red squares with:
- Solid black squares
- White squares
- Orange squares
- Red-and-black granny squares
Make a Pillow
Two finished squares can be joined to create a decorative pillow cover.
Make a Bag
Use the skull square as a front panel for a Halloween-inspired tote or small project bag.
Troubleshooting
Why is my square curling?
The tension may be too tight, or the corner increases may not be evenly distributed.
Try blocking the square first. If it continues to curl, check that every corner contains the required increase.
Why are my corners uneven?
Count the stitches between corners and make sure the same corner sequence is used consistently.
The corner sequence is:
2 dc, ch 2, 2 dc
Why does my skull look too large?
Your yarn or hook may be producing a larger center motif.
Try a slightly smaller hook or adjust the border size.
Why does my skull look too small?
Try a slightly larger hook or add another red border round.
Why are my bobbles flat?
Make sure each popcorn/bobble contains the required stitches and avoid pulling the final loop too tightly.
Why do I have holes around my color changes?
Change colors during the final yarn-over of the preceding stitch and keep the new yarn tension consistent.
Why doesn’t my square lie flat?
Check your corner increases and overall tension. Blocking can also help flatten minor irregularities.
Care Instructions
For best results:
- Hand wash gently in cool water.
- Use a mild detergent when necessary.
- Do not use bleach.
- Avoid aggressive wringing.
- Reshape while damp.
- Lay flat to dry.
- Re-block when necessary.
If the square is incorporated into a blanket, bag, or cushion, follow the care recommendations appropriate for the yarn used.
Final Thoughts
This Red Sugar Skull Crochet Granny Square combines a graphic skull centerpiece with soft crochet texture and a bold red background.
The white skull stands out beautifully against the red field, while the black eyes, nose, and embroidered smile add definition. The white bobble border provides another layer of texture and helps frame the centerpiece.
Make one square as a small seasonal decoration, or create several to build a larger Halloween-inspired crochet project.
Most importantly, take your time with the skull placement and facial embroidery—the small details are what give each finished square its own personality.
Happy crocheting! 🧶❤️