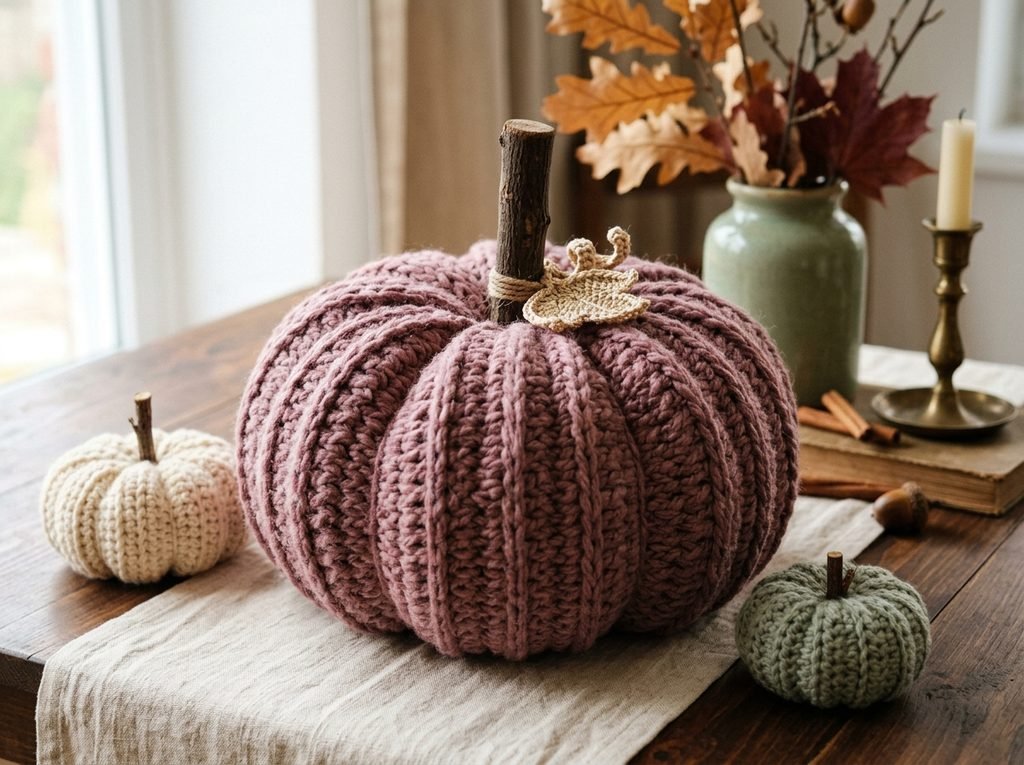
This pumpkin starts as something that looks nothing like a pumpkin: a long, narrow ribbed strip. You crochet it flat, sew the short ends into a tube, gather both ends, stuff it, and sculpt six sections with a few passes of yarn. The finished centerpiece is about 32–38 cm wide, with a squat shape and deep vertical ribs.
No shaping stitches are needed. All the pumpkin shape comes from how you assemble and sculpt the strip, so it is a good project if you enjoy sculptural home décor.
Project Details
| Detail | Specification |
|---|---|
| Skill level | Intermediate |
| Terminology | US crochet terms |
| Finished width | About 32–38 cm |
| Finished height | About 22–25 cm, excluding stem |
| Strip size | About 95–105 × 20–22 cm |
| Main stitch | Half double crochet through the back loop only (hdc BLO) |
| Sections | 6 |
Materials
- Chunky yarn (weight 5) in dusty rose mauve. The amount depends on your tension and how firmly you stuff.
- Crochet hook, 6–8 mm, or the size that gives you a firm but flexible fabric.
- Polyester fiberfill
- Tapestry needle strong enough to pass through several layers of chunky fabric
- Strong matching yarn or cord for gathering and sculpting, about 2 m per groove
- Wooden stem, 7–9 cm long
- Champagne-gold yarn for an optional leaf
- Stitch marker and scissors
Gauge and Sizing
Do not worry about an exact row count. Yarn and tension change everything, so match the measurements instead:
- Width of the strip: 20–22 cm
- Length of the strip: 95–105 cm
Step 1: Crochet the Long Ribbed Strip
Make a foundation chain long enough to measure 20–22 cm. Work hdc BLO across.
Next rows: Ch 2 (does not count as a stitch), turn, hdc BLO in each stitch across. Repeat until the strip measures 95–105 cm.
Each row makes a raised ridge across the narrow width of the strip. Keep your tension even so the ribs look the same from one end to the other. Fasten off and leave a long tail.
Step 2: Join the Strip Into a Tube
Lay the strip flat and bring the two short ends together, matching the ribs. Sew the ends with matching yarn, making several secure passes.
You now have an open tube. The long side of the strip is the tube’s circumference, and the ribs run up and down, which will become the vertical ribs of the pumpkin.
Quick check: Hold the tube upright. You should be able to see through both openings. If not, the strip was twisted before joining, so unpick the seam and try again.
Step 3: Gather and Stuff
Thread strong yarn around one open end, through the edge stitches. Pull gradually until the opening closes into gathers, then tie off firmly. This end is now the bottom.
Add fiberfill in small handfuls, working around the inside so you do not get one dense lump. Fill until the body is round and full, but do not overstuff. It must stay soft enough to compress in the next step.
Step 4: Close the Top and Sculpt the Six Sections
Gather the second opening the same way. Before you pull it tight, add a little more stuffing if you feel any empty spots. Tie off firmly.
Now make the grooves:
- Cut about 2 m of strong yarn and thread your needle.
- Anchor the yarn at the center of the bottom. Push the needle up through the middle of the body and out at the center of the top.
- Wrap the yarn around the outside of the pumpkin, back down to the bottom center, and push the needle up through the middle again.
- Pull gradually until a deep groove forms.
- Repeat until you have six grooves, spaced evenly like orange segments.
Check from above after each pull, because the sections should be evenly spaced and equally deep. Tie off at the top and hide the knot under the stem. Finally, gently press the top and bottom together for the squat pumpkin shape.
Step 5: Add the Stem and Leaf
Attach the stem at the top center by pushing a doubled strand of yarn through the top center and tying it tightly around the base of the stem. For the optional leaf, crochet a small leaf in champagne-gold yarn and sew it next to the stem.
Tips for a Better Result
- Keep the ribs consistent. Even tension gives even ribs.
- Measure, do not count. Aim for the size, not for a specific row number.
- Do not overstuff. If the body feels rock-hard before sculpting, remove some stuffing.
- Pull gradually. Pulling too fast distorts the stitches.
- Keep the handmade look. Small tension variations are part of the charm.
Common Mistakes
The strip twisted when I joined it. One end was rotated before sewing. Lay both ends flat and line up the ribs before you sew.
The pumpkin looks like a cylinder. The grooves were not pulled tightly enough, or the top and bottom were not pressed together. Tighten the grooves and compress the body.
The grooves are uneven. Mark six evenly spaced positions around the body first, and compare neighboring sections after each pull.
The pumpkin looks too round. There is too much stuffing. Remove a little and tighten the grooves.
The ribs disappear. The stitches were too loose or over-stretched. Work a firmer tension and avoid over-pulling.
Variations
- Blush or sage green: Change only the yarn color.
- Neutral farmhouse: Warm ivory yarn with a natural wooden stem.
- Mini pumpkin: Make a shorter, narrower strip and use less stuffing. Reduce both proportionally.
- Textured yarn: It gives a different surface, but very long-fibered yarn can hide the ribs.
Frequently Asked Questions
How many stitches did you use?
Yarn and tension vary, so measure your strip against the 20–22 cm width instead of counting stitches.
Can I use a different yarn weight?
Yes, but the strip and the finished size will change. Adjust your hook and tension until the strip is about 20–22 cm wide and 95–105 cm long.
Can I make it smaller?
Yes. Make a shorter, narrower strip and use less stuffing. The steps stay the same: strip, tube, gather, stuff, gather, sculpt.
How much should I stuff it?
Enough for a full, round body, but still soft enough for the grooves to compress it.
Why does the rib direction matter?
When you join the short ends, the ribs run up and down around the tube, and they become the vertical ribs of the pumpkin.
Final Result
You end up with a soft, squat crochet pumpkin about 32–38 cm wide and 22–25 cm tall, with six deep sections and visible ribs. It works well on a dining table, shelf, or mantel.