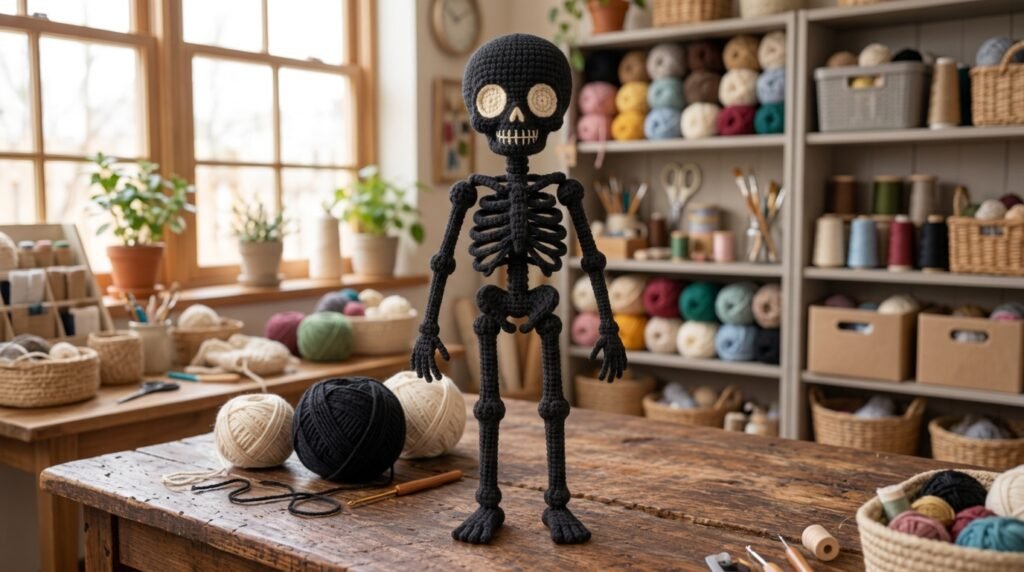
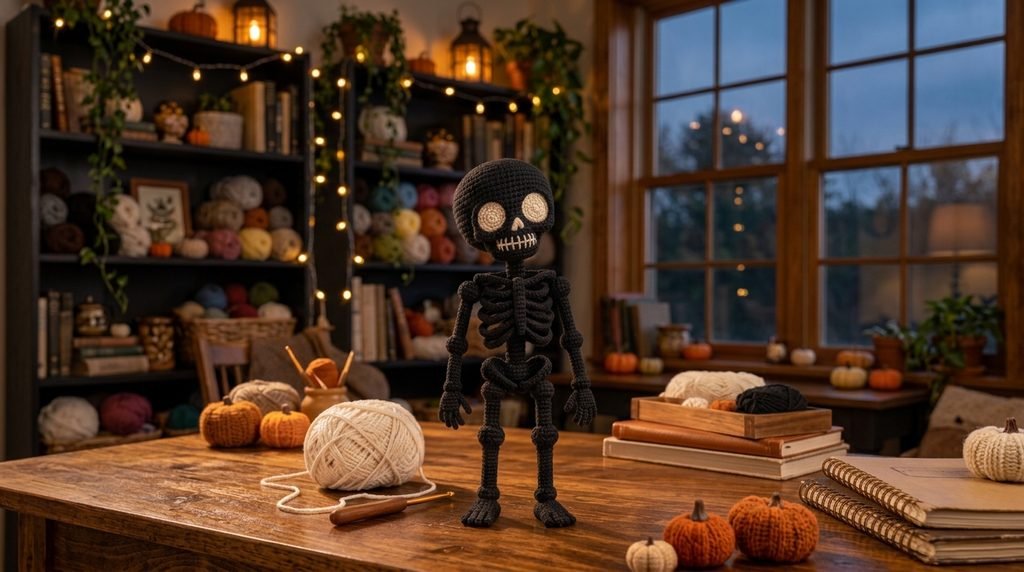
Looking for a unique, creepy-cute Halloween crochet pattern? This Crochet Skeleton Amigurumi Pattern is a fun, highly customizable project perfect for spooky season decor or handmade Halloween gifts.
Featuring a striking high-contrast design with a black skeleton body and cream facial details, this project uses simple tubes, chain-stitch ribs, and clever shaping to build a realistic, posable skeleton. Whether you are adding it to your Halloween shelf decor or making a spooky key chain companion, this step-by-step guide walks you through every round.
Pattern Overview & Project Details
- Finished Height: Approx. 12 inches (30 cm)
- Skull Width: Approx. 2.75 inches (7 cm)
- Arm Span: Approx. 9 inches (23 cm)
- Skill Level: Confident Beginner (Requires basic magic ring, single crochet increases/decreases, and chain slip stitches)
- Hook Size: 2.5 mm crochet hook
- Time to Complete: ~8 hours
Materials Needed
- DK Cotton Yarn in Black: Approx. 140 yards / 128 meters (Main Body)
- DK Cotton Yarn or Thread in Cream: Small amount for facial features & rib/joint accents
- 2.5 mm Crochet Hook (Sizing down keeps stitches tight and prevents fiberfill from showing)
- Cream Felt (For eye sockets)
- Polyester Fiberfill Stuffing
- 4 Pipe Cleaners (Optional, for making a posable skeleton)
- Yarn Needle & Stitch Markers
- Fabric Glue
Yarn Tip: Cotton yarn is strongly recommended over acrylic. Cotton keeps thin amigurumi limbs firm, crisp, and structured without stretching out over time.
Abbreviations (US Terms)
- MR: Magic Ring
- sc: Single Crochet
- inc: Increase (2 sc in same stitch)
- dec: Invisible Decrease
- ch: Chain
- sl st: Slip Stitch
- FO: Fasten Off
- [ ]: Stitch count at the end of the round
Work all tubular pieces in a continuous spiral without joining unless specified. Mark the first stitch of every round with a stitch marker.
Step-by-Step Crochet Skeleton Pattern
1. The Skull (Black Yarn)
- Rnd 1: 6 sc in MR [6]
- Rnd 2: inc in each st around [12]
- Rnd 3: (sc 1, inc) x6 [18]
- Rnd 4: (sc 2, inc) x6 [24]
- Rnd 5: (sc 3, inc) x6 [30]
- Rnds 6–11: sc around [30]
- Rnd 12: (sc 3, dec) x6 [24]
- Rnds 13–14: sc around [24]
- Rnd 15: (sc 2, dec) x6 [18]
- Rnd 16: sc around [18]
- Rnd 17: (sc 1, dec) x6 [12]
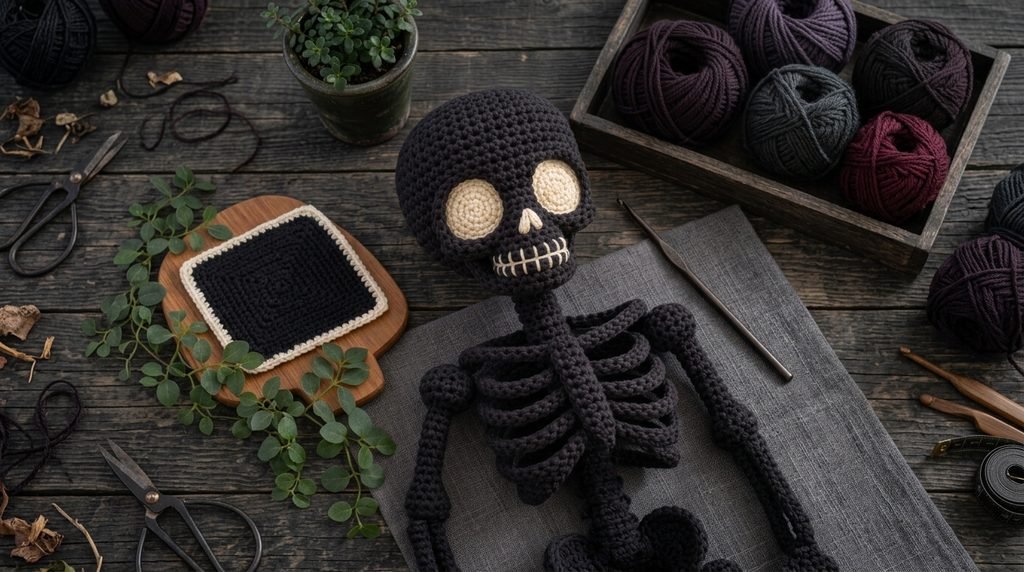
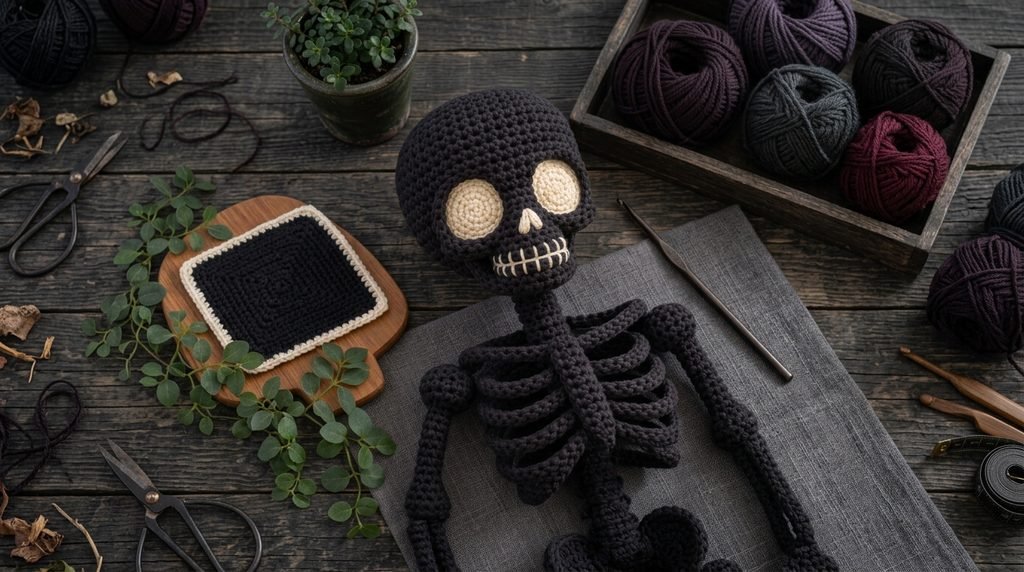
Stuff the skull firmly. Fasten off (FO), leaving a long tail for assembly.
Cream Face Details:
- Eyes: Cut two slightly oval shapes out of cream felt. Glue them between Rounds 8 and 10, spaced approximately 5 stitches apart.
- Nose: Using cream yarn, stitch an upside-down “V” shape near Round 12.
- Mouth & Teeth: Make short vertical stitches using cream yarn across Rounds 14–15 to create the teeth. Outline or define the mouth line using thin cream threads.
2. Neck and Spine (Black Yarn)
- Neck:
- Rnd 1: 6 sc in MR [6]
- Rnds 2–6: sc around [6] (5 rounds total)
- Lightly stuff and FO.
- Spine:
- Rnd 1: 7 sc in MR [7]
- Rnds 2–24: sc around [7] (23 rounds total)
- Stuff very firmly. FO.
Pro-Tip: The spine must be firm to prevent the skeleton body from slumping. Insert extra stuffing or slide a pipe cleaner inside for maximum stability.
3. Ribs, Sternum, and Collarbones (Black Yarn)
- Sternum (Make 1):
- Ch 11, sc in 2nd ch from hook and across [10]. FO.
- Ribs (Make 8 – 4 Matching Pairs):
- Method: Ch designated length below, sl st in 2nd ch from hook and in each ch across. FO, leaving long tails.
- Pair 1: Ch 11
- Pair 2: Ch 13
- Pair 3: Ch 12
- Pair 4: Ch 10
- Collarbones (Make 2):
- Ch 9, sl st in 2nd ch from hook and across [8]. FO.
4. Pelvis (Black Yarn)
- Rnd 1: 6 sc in MR [6]
- Rnd 2: inc in each st around [12]
- Rnd 3: (sc 1, inc) x6 [18]
- Rnd 4: sc around [18]
Flatten the piece flat and sc across both top layers together to close [9]. FO with a long tail. Pinch the center and take two small tight stitches to create a curved dip, forming a pelvic shape rather than a flat piece.
5. Arms (Make 2 – Black Yarn)
Upper Arm
- Rnd 1: 6 sc in MR [6]
- Rnd 2: inc around [12]
- Rnd 3: dec around [6]
- Rnds 4–12: sc around [6]
- Rnd 13: inc around [12]
- Rnd 14: dec around [6]
Forearm
- Work Rnds 1–3 as above.
- Rnds 4–11: sc around [6]
- Work Rnds 13–14 (Inc around to 12, Dec around to 6) to create matching elbow/wrist joints.
Stuff limbs lightly as you go.
Hand & Fingers
- Base Hand: Ch 4, sc in 2nd ch from hook and next 2 chs, work 3 sc in the last ch, then continue down opposite side of chain [8]. Join with sl st.
- 3 Fingers: Ch 5, sl st in 2nd ch from hook and back down, attach to hand with sl st. Repeat for 3 fingers.
- Thumb: Ch 4, sl st down, attach to side of hand.
- Sew hand securely to the forearm.
6. Legs (Make 2 – Black Yarn)
Thigh
- Work same as Upper Arm structure, but work 12 even rounds (Rnds 4–15).
Shin
- Work same as Thigh structure, but work 11 even rounds.
Foot & Toes
- Base Foot: Ch 6, sc in 2nd ch from hook and next 3 chs, 3 sc in last ch, sc 4 along opposite side [12]. Work 2 rounds of sc around [12].
- 4 Toes: Work Ch 3, sl st back down, and attach along front edge of foot. Repeat for 4 toes.
Complete Assembly Instructions
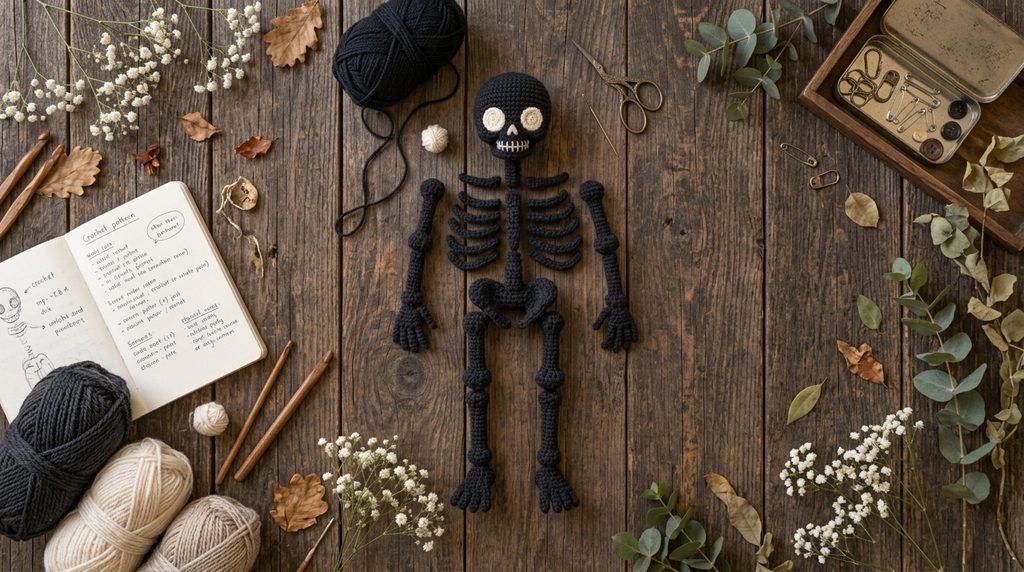
- Attach Skull & Neck: Sew the head to the neck, then sew the neck to the top of the spine. Secure with double stitching around the join.
- Attach Sternum: Sew the sternum down the front center of the spine, starting roughly 1 inch below the neck.
- Attach Ribs: Pin and sew each rib pair extending from the spine around to the sternum, ordering from top to bottom (Pair 1 at top, Pair 2, Pair 3, Pair 4 at bottom).
- Attach Collarbones & Arms: Sew collarbones across the top of the chest, then attach upper arms to the outer ends of the collarbones.
- Attach Pelvis & Legs: Sew the pelvis to the bottom base of the spine, then attach each leg with a small gap between them.
- (Optional) Insert pipe cleaners inside limbs before closing seams to create a fully poseable Halloween skeleton figurine.
Troubleshooting & Crochet Tips
- Head Flops Forward: Add extra fiberfill inside the neck join or push a pipe cleaner through the spine up into the skull center.
- Uneven Ribs: Pin all rib chains in place before sewing. Stitch matching left/right pairs simultaneously.
- Proportion Fixes: Varying rib lengths ensures a realistic rounded chest structure instead of a rectangular block shape.
Frequently Asked Questions
Can I make this amigurumi posable?
Yes! Thread pipe cleaners into the spine, arms, and legs during assembly. This allows you to bend and pose your skeleton in fun Halloween positions.
How do I make a larger or smaller version?
To make a larger skeleton amigurumi, use worsted weight (Category 4) yarn with a 3.5 mm hook. No pattern math adjustments needed!
Can I sell items made from this pattern?
Yes, finished physical handmade items can be sold. Please credit the original pattern design.